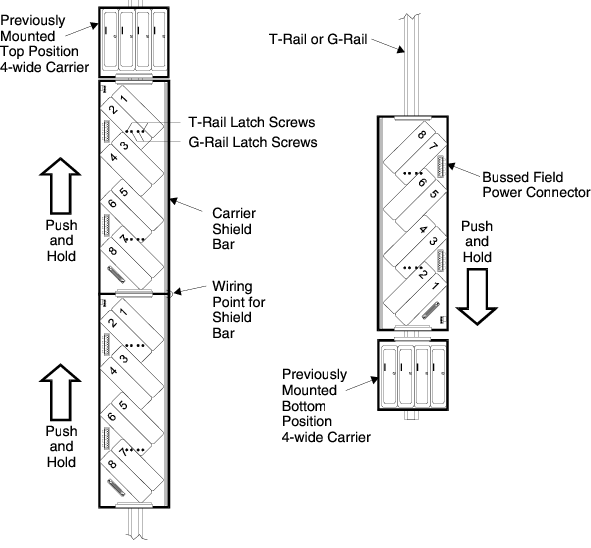
Connect each 8-wide carrier to any adjacent carriers by sliding
the 96-pin connectors at the top or bottom of the carriers together. Hold the
carrier in position to ensure that it does not fall.
Turn the screws counter-clockwise to disengage the latch. With the
carrier on the rail, tighten the screws clockwise to latch.
Note
The middle two screws are for G-rail mounting and the outer
screws are for T-rail mounting.
If you are mounting 8-wide carriers on separate rails, use the
bottom cable extender for a left-to-right bridge and the top cable extender for
a right-to-left bridge.
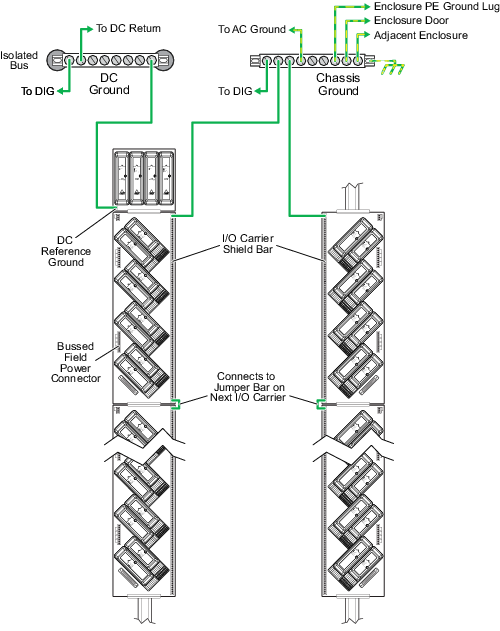
Install ground wiring as shown in the following figure. For a good
connection, use a signal ground cable and a block spade terminal, sized for
AC/DC system power.