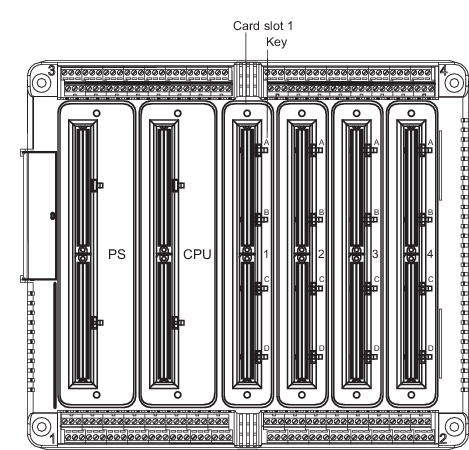
The I/O cards install in the slots labeled 1, 2, 3, and 4 on the
carrier. Each slot has four keys labeled A, B, C, and D that are used to
configure the slot to allow only a specific card type to be installed.
In hazardous locations the I/O cards should
not be removed or inserted into the carrier unless the input power has been
de-energized for at least one minute.
Figure: Card slot and key on the carrier
Locate the slot into which you want to install the I/O card.
Break off the appropriate keys with a screwdriver.
Table: Keying assignments
Card
Carrier keys to be removed
Zone 1 Discrete I/O
B and D
Zone 1 Analog I/O
A and C
Note
A key replacement kit is included with each carrier to
reconfigure the slots.
Align the connectors on the back of the I/O card with the
connectors on the carrier and push to attach the I/O card to the carrier.
Tighten the two mounting screws on the card with a 3 mm hex-head
wrench.