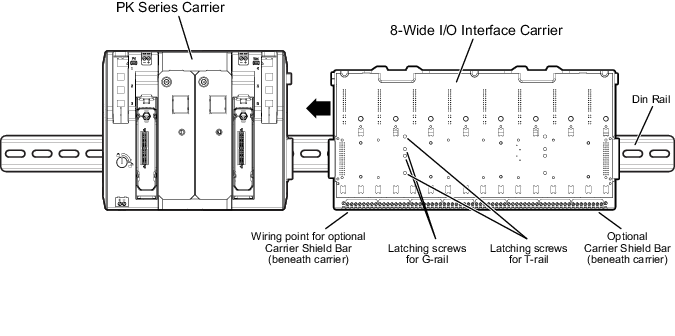
- Install the DIN rail at the appropriate location.
- Connect each I/O interface carrier to any adjacent carriers by sliding together the 48-pin connectors on the sides of the carriers.
-
Turn the screws counter-clockwise on the I/O interface carrier to
disengage the latch. Place the carrier on the rail and tighten the screws
clockwise to latch. The upper and lower screws are for T-rail mounting.
Note
The middle two screws are used for G-rail mounting and are not used when the rail has both the PK controller carrier and the I/O carrier. PK controller carrier only mounts on the T-rail.
- If you are installing I/O interface carriers on separate rails, connect them with the LocalBus cable from the 48-pin connector on the right side of one carrier to the 48-pin connector on the left side of the next carrier.
- Install the carrier ground wiring as appropriate for the carrier.