This procedure describes how to install the VirtualBox environment and instantiate the virtual DeltaV machine.
-
Install the required files, in the following order:
-
Double click VirtualBox Windows Hosts download file to
install. Accept all default configurations. Various warnings display that
pertain to changes to the computer and to the network. Accept these changes.
Once installed, ensure the VirtualBox application is closed before proceeding to next step.
- Double click the VirtualBox Extension Pack. Accept all default configurations and warnings that appear.
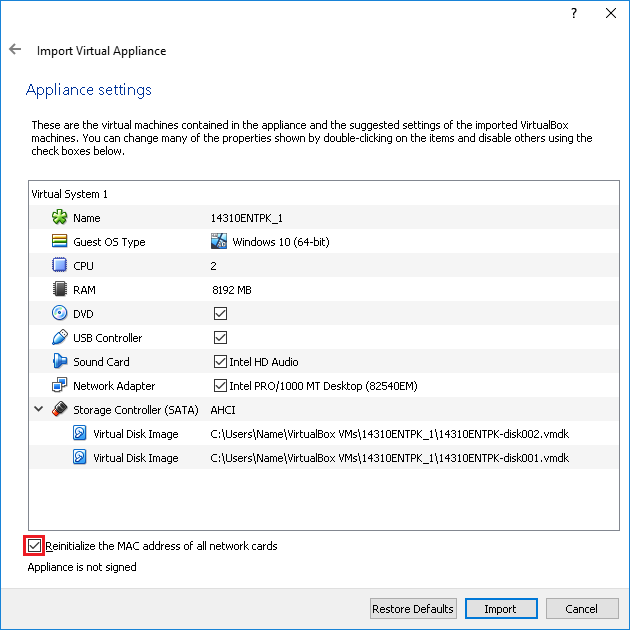
- Double click the PKDVD OVA image. This imports the DeltaV PK image. Settings are dependent on the host computer.
-
Make changes as needed. For example, you might want to change
the name of the virtual machine, increase the RAM, or change the virtual disk
image location to the match the new virtual machine name.
Note
Some of these settings are easy to change later (virtual machine name and RAM, for example) while others are more difficult (virtual disk image location and name). It is best to create the virtual machine with the settings you need instead of trying to change the settings later.
Any location that you choose for the virtual disk image should have enough space to contain the files (80GB per virtual hard disk).
Do not reduce the amount of RAM. The virtual PK Engineering Station will not function correctly with less than 8GB of RAM. Also, do not deselect the USB Controller or the Network Adapter.
- Click Import.
-
Double click VirtualBox Windows Hosts download file to
install. Accept all default configurations. Various warnings display that
pertain to changes to the computer and to the network. Accept these changes.
-
Configure the virtual machine - before running the virtual
machine, the following changes should be made.
-
Ensure the Ethernet port is recognized by the virtual machine.
- Identify your
physical network adapters on your laptop.
- Open .
- Disconnect a network cable (or connect a live network cable if no cables are currently connected). Watch for the red x next to the network adapter name (if you are disconnecting a cable, a red x appears. If connecting a cable, the red x disappears).
- Name the adapter something appropriate (for example, OfficeLAN, PKLAN, and so on).
- Note the manufacturer name
- If the network adapters all have the same manufacturer name (and version), note the Physical Address (also called the MAC address) of the card. (Right click, select Status, and click the Details button.)
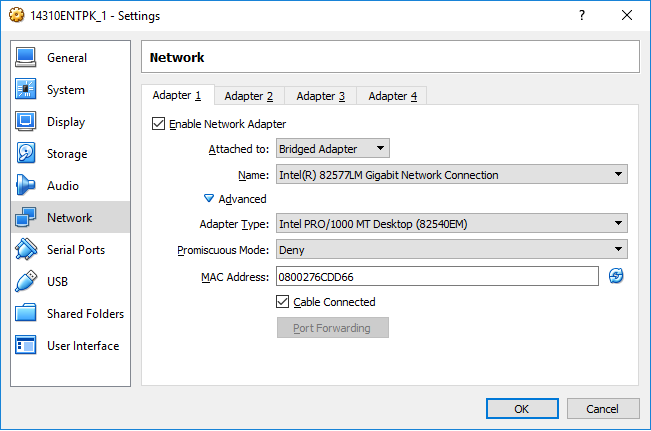
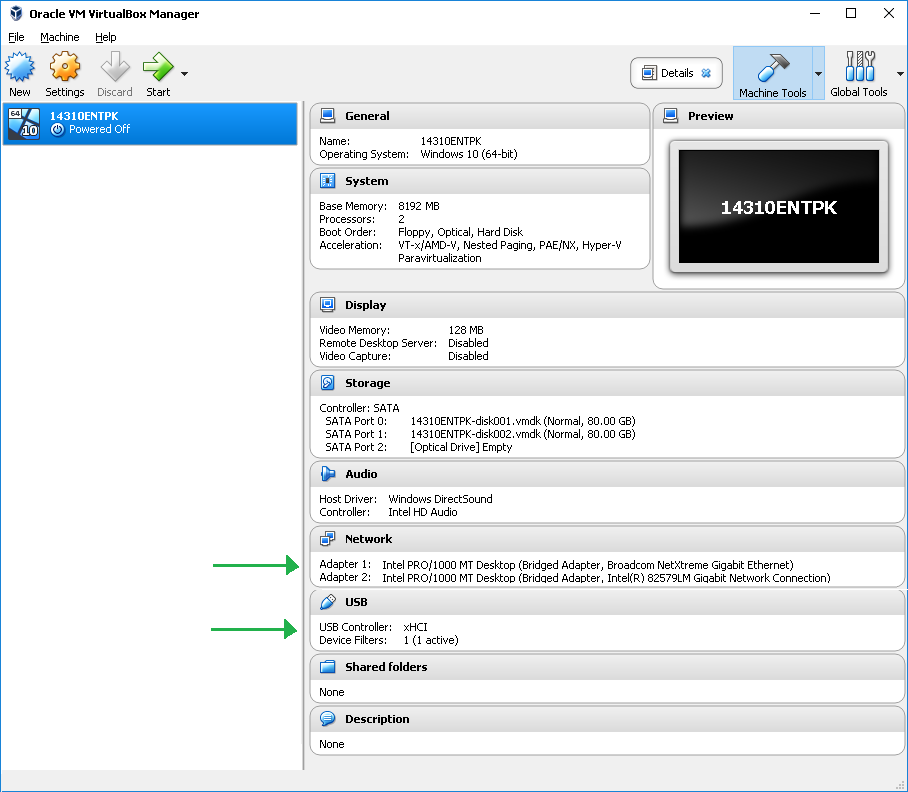
- On the virtual machine's settings, configure the network adapters (two, one for the office network and one for the DeltaV PK controller network).
- Identify your
physical network adapters on your laptop.
-
Enable the USB port for the License key to be recognized.
If your keyboard and mouse are attached through the USB port, you can enable the USB filters for those devices (although it may not be necessary). Experiment with how well the mouse and keyboard work for each setting. For example, enable the keyboard but not the mouse, start the virtual machine; and, see if the shortcut keys work, if the mouse is visible, and so on. Behavior can also be affected by the keyboard/mouse device driver or the device's settings (size of pointer, and so on).
- Prior to starting the virtual machine, disable the firewall on the host machine. This may require disabling the antivirus program.
-
Ensure the Ethernet port is recognized by the virtual machine.
-
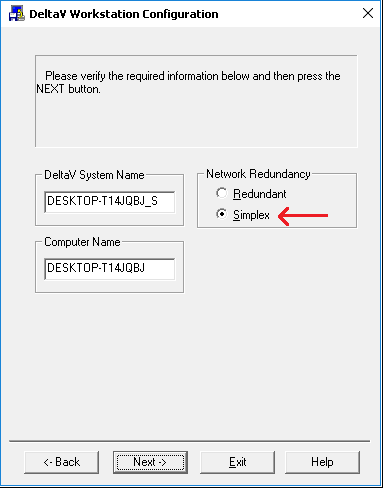
Run DeltaV Workstation Configuration on the virtual machine.
Workstation Configuration starts automatically when you first log in to the virtual machine after logging into the Windows operating system for the first time.
- Select the appropriate options on the dialogs (help for each dialog is available by clicking the Help button). Most of the settings can remain as they are without change.
- Change the Computer Name to something meaningful. This changes the operating system name of the machine and is what will display in DeltaV Explorer for this node. This does not affect the name of the virtual machine as seen in VirtualBox.
- After each reboot/restart, log in using the same administrator credentials.