Install the DeltaV Web Server application

Note

DeltaV Web Server installation copies files used by the DeltaV system, and reboots after the installation completes. Do not run this installation unless the Application Station can be stopped and rebooted without affecting your process or other DeltaV users.

DeltaV Web Server software and licenses must be installed following the installation or reinstallation of DeltaV software. You must uninstall DeltaV Web Server before uninstalling DeltaV software.

Required Server Software

Important

Internet Information Services (IIS) must be configured before installing DeltaV Web Server software.

Application Station Requirements

The DeltaV Web Server software cannot be successfully installed on an Application Station that has an underscore (_) character in its name. The Application Station must be renamed in order for the installation to be successful.

  1. Verify that the Application Station has the following components installed (These components are part of a standard Application Station setup.):
    • (Internet Information Services (IIS) is included during the installation)
    • DeltaV current version (includes Internet Explorer)
    Note

    ActiveX controls, JavaScript, Java applets and active scripting are enabled by default during the DeltaV installation of Internet Explorer. Be sure to enable them on any other Web browsers that will be used with DeltaV Web Server.

    Verify that the Internet Explorer security setting on any client machines is set to Medium. A security setting of High will not allow DeltaV Web Server to function properly.

  2. Install DeltaV Web Server, as follows:
    Note

    DeltaV Web Server installation copies files used by the DeltaV system, and reboots after the installation completes. Do not run this installation unless the Application Station can be stopped and rebooted without affecting your process or other DeltaV users.

    1. Insert the DeltaV installation disk #1 in the drive and open the DV_Extras\DVWebServer directory.
    2. Run the setup.

    DeltaV Web Server is installed to the location of the Default Web Site in IIS, typically c:\InetPub\wwwroot.

    The installation path cannot contain spaces due to a limitation of some parts of this application.

  3. Download Licenses

    Download the DeltaV Web Server licenses from the ProfessionalPLUS after having assigned them to the DeltaV Web Server Application Station. You should reboot the Application Station after doing this to ensure that Internet Information Services (IIS) and DeltaV Web Server software can see the updated licenses.

  4. Install Licenses

    The license setup installation senses the DeltaV Web Server license, the number of users, etc., and associates that with the @aGlance graphics software.

    Important

    Before running this setup, you must assign the DeltaV Web Server license to the Application Station and download it.

    1. After license downloading completes, insert the DeltaV installation disk #1 and run setup.exe for the process graphic licenses. This setup is found in the DV_Extras\DVWebServer\LicenseSetup directory.
    2. When prompted to import the license, click Yes, browse to the license file (found in the Windows\AAGLicense directory).
      Note

      If you respond No to importing the license, you can return to the Windows Start menu and run the License Setup application from StartProgramsWeb @A GlanceAdministrationLicensing Tool.

    3. After selecting the license file, the rest of the process is automatic. When done, exit the License setup dialog.
  5. Import Toolbar to Graphics Workspace
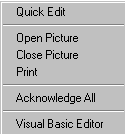
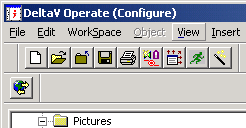
    1. Open DeltaV Operate and switch to the graphic editor workspace by right-clicking the picture or an empty part of the upper toolbar and selecting Quick Edit from the context menu.

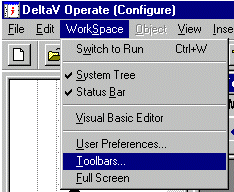
    2. Once the workspace has loaded, select WorkSpace from the menu bar, and then click Toolbars.

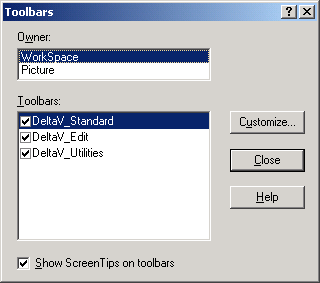
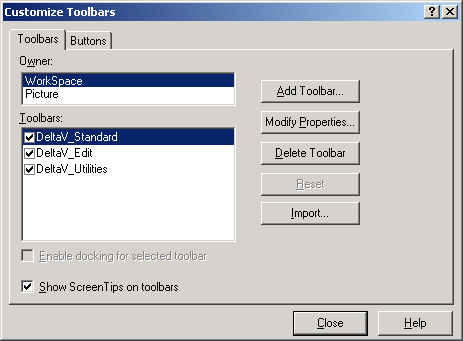
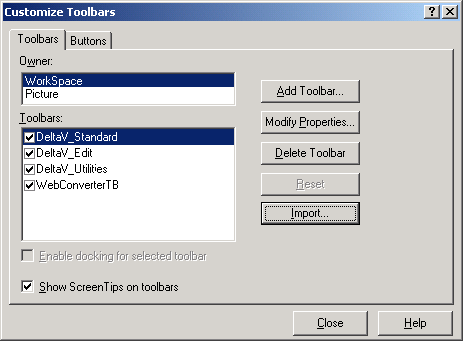
    3. Select Customize to open the Customize Toolbars dialog.

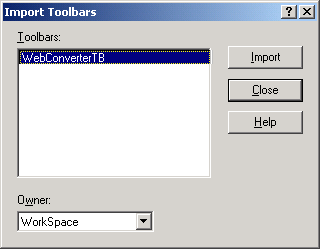
    4. Click the Import button to display the available toolbars that can be imported.

    5. Select WebConverterTB from the list shown, and then click Import.

    6. Upon a successful import, close the list. The DeltaV Operate converter should appear in the list of active toolbars as shown below.

    7. Closing the list of toolbars will add the converter to the editor workspace as shown.

  6. Configure DeltaV Web Server
    1. Convert graphics.
      Note

      This is an iterative process. Graphics that do not convert initially will need to be altered until they do convert. For example, graphics that contain both BMP and JPG pictures in them will not convert. You must open those graphics and make all the pictures either BMP or JPG types and run the conversion again.

    2. Define aliases.
    3. Set up trends.