DeltaV OPC Data Access Server functional overview > Redundant DeltaV OPC Data Access Server > Setting up a partner Application Station for redundant DeltaV OPC DA Server

Set up the existing Application Station

  1. Connect the new Application Station to the DeltaV network.
  2. In DeltaV Explorer on the ProfessionalPLUS workstation, right-click the existing Application Station under System Configuration → Physical Network → Control Network.
  3. Click Properties on the shortcut menu for the Application Station.
    You can optionally change the name of the existing Application Station on the General tab of the Properties dialog, but this is not necessary. However, changing the Application Station name is strongly recommended if it coincidentally ends with the characters _S.
    Important

    As a general rule, do not specify an Application Station name that ends with the characters _S. When the DeltaV system creates a pair of Application Stations for redundant DeltaV OPC Data Access Server, it appends these characters to whatever name you specify as the base name for the Application Station. Having a pair of Application Stations named nodename_S and nodename_S_S could result in misleading or undesirable results while working with redundant DeltaV OPC Data Access Server.

  4. On the Redundancy tab of the Properties dialog, check the Enable a redundant subsystem option, select the Assigned Modules option, and then select either the OPC Data Access Server option or the OPC Data Access Server and OPC Mirror option.
    Important

    You cannot enable redundant DeltaV OPC Data Access Server on a pair of Application Stations if you have already enabled any other subsystems, such as Batch Executive, Batch Historian, Continuous Historian, Campaign Manager, Alarms and Events, or Remote Network, for the existing Application Station. To enable redundant DeltaV OPC Data Access Server on a pair of Application Stations, you must first disable any previously-enabled subsystems for this Application Station.

  5. You can optionally enable the Unattended Workstation Reboot on Failover or Manual Switchover option, if either of the Application Stations will be located in an unmanned facility, for example.
    Figure: Enabling redundant DeltaV OPC Data Access Server with OPC Mirror
  6. Click OK to close the Properties dialog for the Application Station.
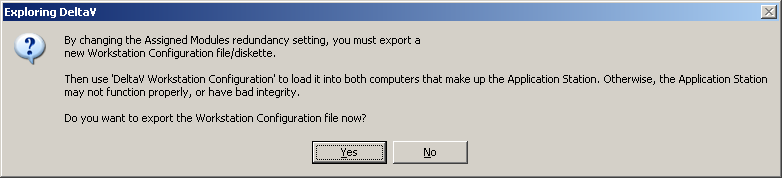
  7. When prompted to export a workstation configuration file for the existing Application Station, click Yes. Save the workstation configuration file either to removable media or to a network location that can be accessed from the Application Station you are configuring. You can use the default name for a workstation configuration file, DevData.cfg, or specify a different file name.
  8. On the existing Application Station, import the workstation configuration file by clicking Start → DeltaV Installation → DeltaV Workstation Configuration.
  9. When the introductory DeltaV Workstation Configuration dialog appears, click Next.
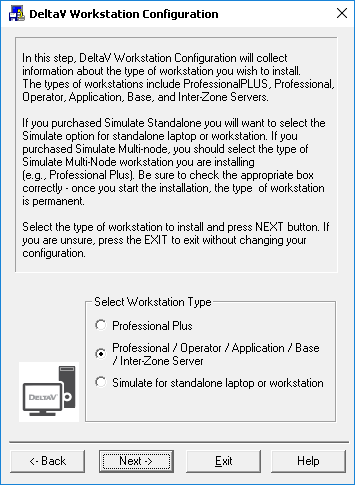
  10. For the Select Workstation Type option, select Professional / Operator / Application / Base / Inter-Zone Server, and then click Next.
    Figure: Specifying the type of workstation
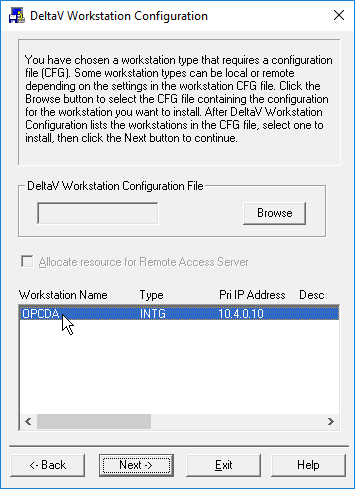
  11. When prompted to provide the workstation configuration file that you made earlier on the ProfessionalPLUS workstation, click Browse, navigate to the exported workstation configuration file, and double-click it.
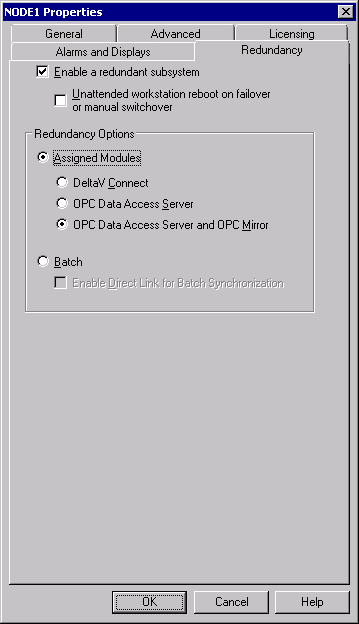
    Figure: Importing the workstation configuration file

  12. Select the workstation name, and then click Next.
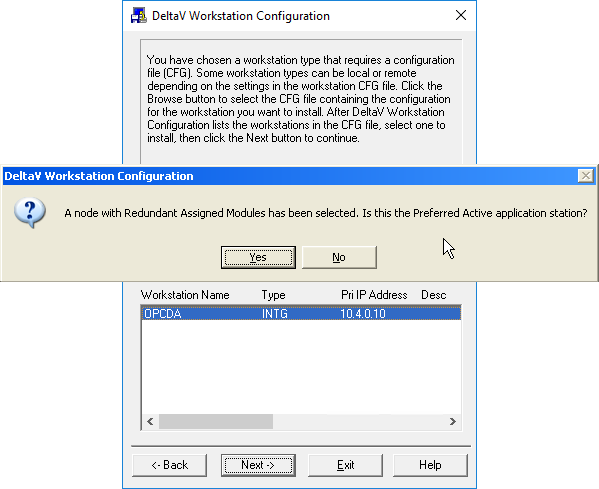
    The following message appears: A node with Redundant Assigned Modules has been selected. Is this the preferred active Application Station? It is recommended that you respond to this prompt by clicking Yes when configuring the existing Application Station. When you click Yes, the Application Station is given the name specified for it in DeltaV Explorer.
  13. Follow the on-screen instructions to complete the configuration of the Application Station.
    Note

    If you ever need to reconfigure either workstation in the pair, you should respond to this prompt by clicking Yes if it is the Application Station that you specified as the preferred active; otherwise, click No, if it is the workstation with the characters _S appended to the base Application Station name.